
Manav Sampada Service History Update: Step-by-Step Guide (2025)
Your Manav Sampada service history is a critical part of your employment records and plays an essential role in career progression, pension calculations, and other HR-related processes. The Manav Sampada Portal allows government employees to keep their service records up-to-date, ensuring that all career milestones, promotions, transfers, and other key details are accurately reflected.
This guide will walk you through the process of Manav Sampada Service History Update. Accurate Payroll and Benefits: Ensures that your salary, leave entitlements, and Manav Sampada Pension Details are calculated correctly, providing a clear overview of your financial benefits.
on the Manav Sampada Portal and ensure that your employment records are always current.
Step 1: Log Into the Manav Sampada Portal
Before making any updates to your service history, you need to log into the Manav Sampada Portal:
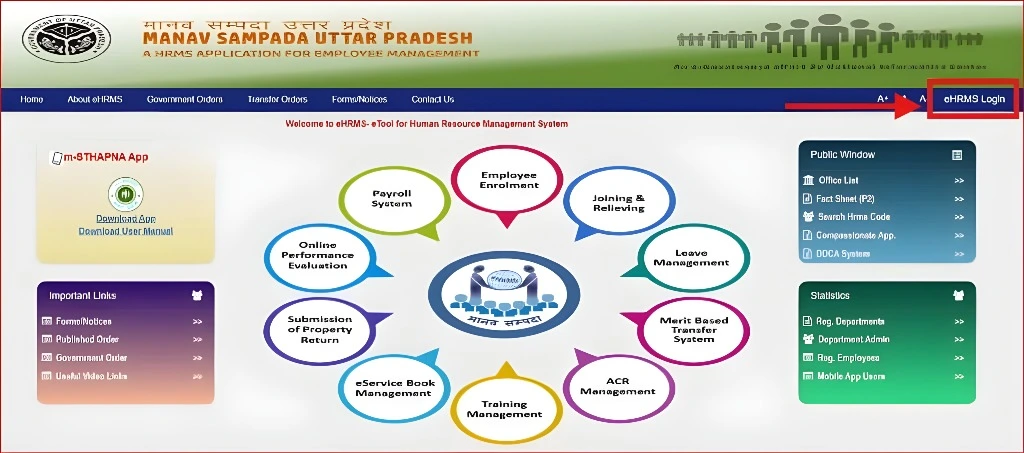
Visit the Portal:
Open your browser and navigate to the official Manav Sampada Portal.
Enter Your Credentials:
Input your User ID and Password.
Select Your Department:
Choose your respective department from the dropdown menu.
Click ‘Login’:
Once you’ve entered your login details, click Login to access your dashboard.
Step 2: Access the ‘Employee Profile’ Section
After logging into the portal, follow these steps to find and update your service history:
On your dashboard, locate and click on Employee Profile. This section houses all your personal and service-related information.
Inside your Employee Profile, click on the Service History or Service Records section to view and update your service details.
Step 3: Review Your Current Service History
Before making any changes, it’s important to review your current service history to ensure that the existing details are accurate. This may include:
The date you officially started your employment
Details of any promotions, designations, or job changes throughout your career.
Any departmental or location transfers.
Check if your leave history is correctly recorded, including any adjustments made due to long-term leaves or medical absences.
Ensure that any breaks in service, such as sabbaticals, unpaid leaves, or service gaps, are accurately reflected.
Step 4: Update Your Service History
To update your service history, follow these steps:
Click on ‘Edit’:
If the portal allows, there will be an Edit button next to your service history. Click on it to make changes.
Enter Correct Information: Update the relevant fields, such as:
New Designations: If you’ve received a promotion or moved to a new position, update your job title and position.
Transfer Details: If you’ve transferred to a different department
or location, enter the details, including the date of transfer and
new location/department.
Leave Adjustments: Update any leave-related information, such
as long-term leave, maternity leave, or other special leave.
Other Updates: Add any other career-related updates, such as
special assignments, awards, or certifications received.
Upload Supporting Documents (If Required):
Some updates may require supporting documentation, such as promotion letters, transfer orders, or medical certificates. Make sure to upload the necessary documents as PDFs or JPGs.
Click ‘Save’:
Once you’ve entered all the changes, click Save or Submit to update your service history.
Step 5: Request Approval (If Required)
Some departments may require approval from a supervisor or HR before finalizing updates to your service history:
If your service history update needs approval, it will be sent to the relevant authority (e.g., HR, supervisor) for review.
Once the changes are approved, you’ll receive a confirmation via email or SMS, and the changes will be reflected in your profile.
Step 6: Verify and Download Updated Service History
After the update has been processed:
Go back to the Service History section and verify that all the changes are reflected correctly.
You can download or print a copy of your updated service history for future reference. This can be important for your personal records, promotions, or retirement benefits.
Step 7: Regularly Review Your Service History
Even after updating, it’s essential to periodically review your service history to ensure its accuracy. Manav Sampada allows you to make ongoing updates, so keep your records current:
Set a reminder to check your service history annually to ensure that it aligns with your actual job history.
Ensure your service history is accurate before important events like promotion reviews, salary revisions, or retirement.
Benefits of Keeping Your Service History Updated
Accurate Payroll and Benefits:
Ensures that your salary, pension, and leave entitlements are calculated correctly.
Career Growth Tracking:
Keeps a record of your promotions, transfers, and other key milestones in your career.
Smooth Transition During Retirement:
Having accurate service records ensures a smooth transition when it’s time for retirement, making it easier to process pension benefits.
HR Transparency:
Updated service records help maintain transparency and consistency in HR processes, ensuring fairness in promotions and leave approvals.
FAQs
Final Thought
Updating your service history on the Manav Sampada Portal is a simple yet crucial task for ensuring that your employment records remain accurate and up-to-date. Whether it’s tracking your promotions, transfers, or leave history, keeping your service records current is essential for seamless HR management.
By following the steps outlined in this guide, you can easily update your service history and ensure that all your career milestones are properly recorded.


